Diamond painting is done by matching tiny resin drills to symbols on a sticky, pre-printed canvas. You peel back a small section of the protective film, load the pen with wax, pick up one drill at a time, and place it onto the matching symbol.
The steps are simple, but the first kit can still get messy if you uncover too much adhesive, mix similar colors, work in poor light, or leave crooked rows until later.
This guide walks you through the full process, from opening the kit to pressing the finished canvas, with the small details that make diamond painting easier for beginners.

Before You Start: The Basic Idea
Diamond painting is a DIY craft where you place small resin diamonds, also called drills, onto a sticky, symbol-coded canvas. Each symbol matches a drill color, so the image is built piece by piece.
This article focuses on the practical steps. For a fuller beginner explanation of the craft, see our guide to what is diamond painting.
How Does Diamond Painting Work?
Diamond painting works through a simple matching system. The canvas has a printed symbol chart, and each symbol matches a color number on a drill packet.
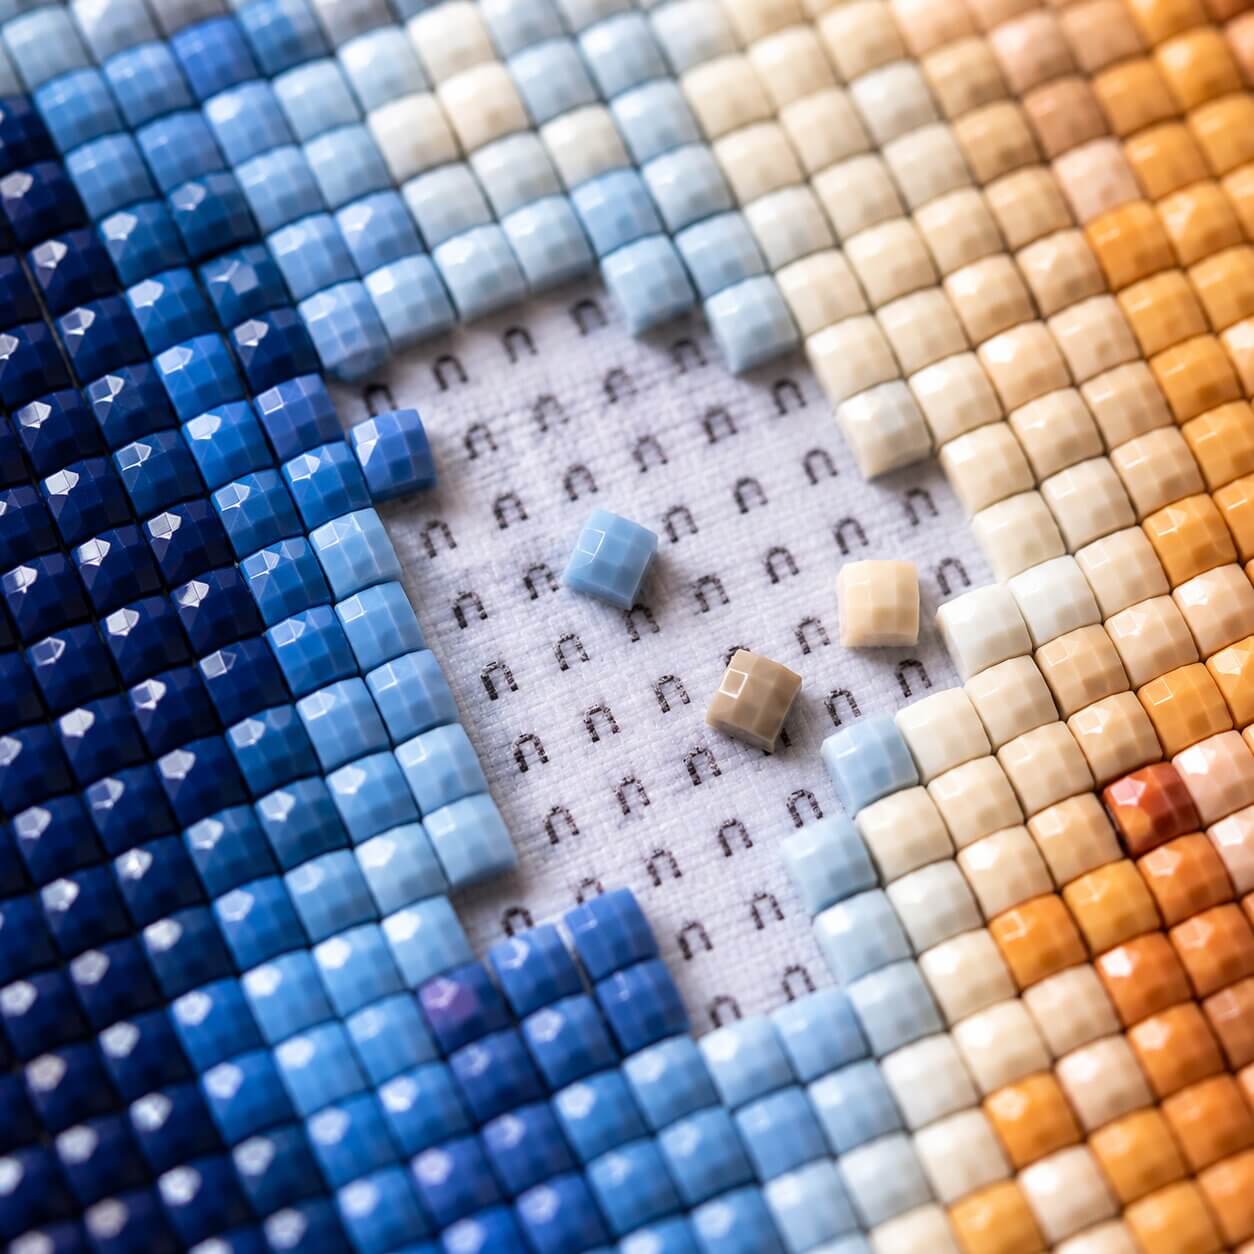
You place the drills one by one until the printed image is fully covered. The flat side sticks to the adhesive canvas, while the faceted side faces up and creates the shine.
This is why diamond painting is sometimes called painting with diamonds. You are not using paint, but you are building the image with small diamond-like pieces.
What Comes in a Diamond Painting Kit?
Before you start, open the kit and check each part. A standard diamond painting kit usually includes:
- A printed adhesive canvas
- Resin drills, diamonds, or gems
- A color chart or symbol key
- A diamond painting pen
- Wax
- A grooved tray
- Small storage bags or drill packets
- Basic instructions
The diamond painting pen is sometimes called a stylus or applicator. The resin pieces may be called drills, diamonds, or gems, but they all mean the same small pieces you place onto the canvas.
The canvas is covered with a clear protective film. Keep it on as long as possible. It protects the adhesive from dust, lint, hair, and drying out while you work.
Before placing anything, check that the drill packets match the chart. It only takes a minute and saves a lot of frustration later, especially when several colors look almost the same.
How to Diamond Paint Step by Step
Step 1: Flatten the Canvas
Lay the canvas on a clean, flat table. If it arrived rolled, let it relax before you start. A curved canvas is harder to work on because the edges lift and the drills can shift while you place them.
You can gently place books on the corners for a few hours. Do not iron the adhesive area and do not remove the protective film just to flatten the canvas.
For a more detailed method, see our guide on how to flatten a diamond painting canvas before starting.
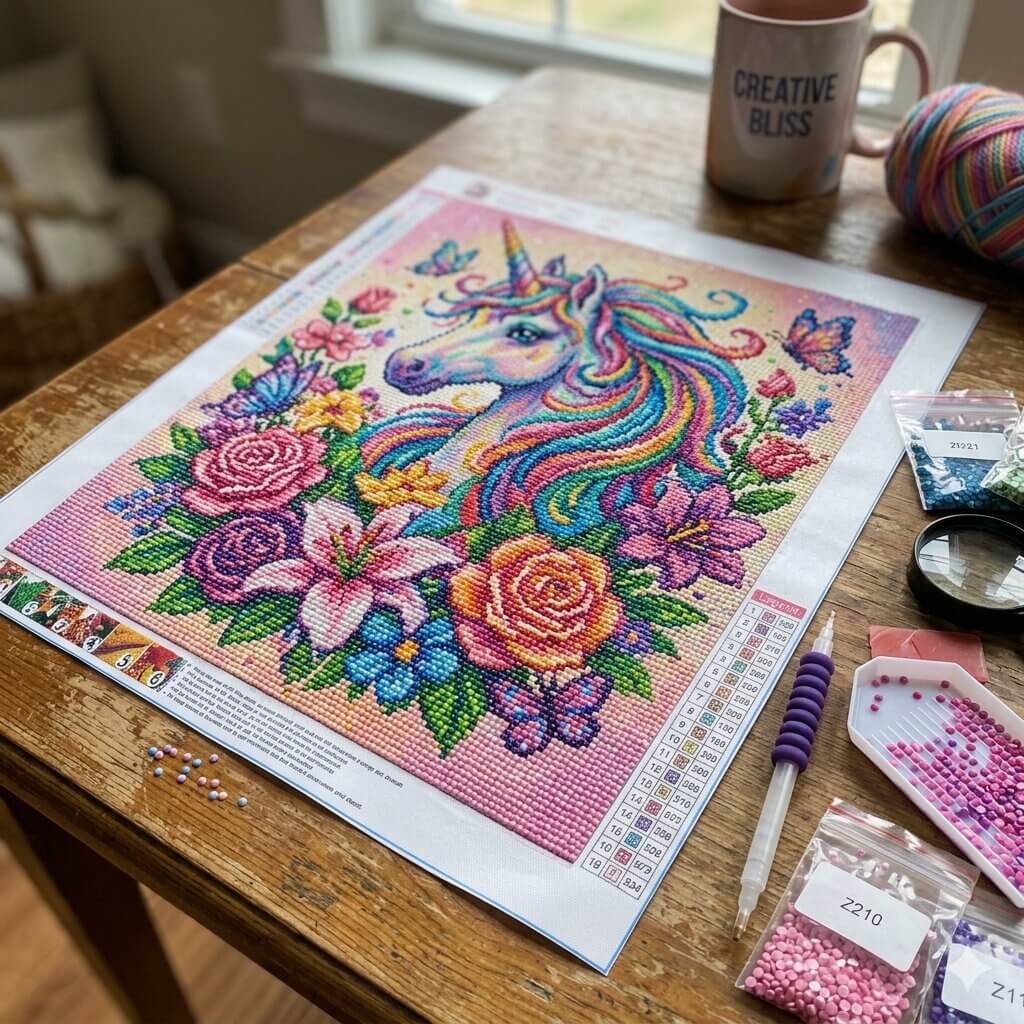
Step 2: Check the Symbols and Color Key
Look at the printed symbols on the canvas and compare them with the color key. Pick one small area and identify the symbols inside it before opening any drill packets.
Most kits also show a color number next to each symbol. Use this number to match the correct drill packet before you open it.
Some symbols can look very similar at first glance. “B” and “8” or “S” and “5” are easy to confuse under weak light.
A bright lamp or light pad helps, especially with dark designs or small symbols.
Step 3: Organize the Drill Packets
Each drill packet has a color code. Match the packet to the symbol key before you pour anything into the tray.
Avoid opening several similar colors at once unless you already have containers ready. Mixed drills take much longer to sort than to prevent.
Keep opened colors in their original storage bags or small containers when you are not using them.
You can work with one color at a time or one small section at a time. For a first project, finishing small sections is usually easier because it keeps the adhesive protected and the progress visible.
Step 4: Peel Back a Small Section of the Film
Choose a small section of the canvas, usually a corner or edge. Peel back only enough film to work on a 2x2 inch or 5–10 cm area.
Do not uncover the whole canvas. The adhesive will collect dust, and your hand may stick to the surface while you work.
Wash your hands before touching the canvas. Oil, lint, and dust can reduce the stickiness of the adhesive.
Some crafters cut the protective film into smaller sections. That can help, but be careful not to cut the canvas underneath.
Step 5: Pour Drills Into the Tray
Pour a small amount of one drill color into the grooved tray. Do not overfill it.
Use scissors to snip a small corner of the packet if it is hard to open cleanly. This helps prevent drills from spilling across the table.
Gently shake the tray from side to side. The grooves help turn many drills flat side down and faceted side up, so they are easier to pick up with the pen.
The flat side goes onto the canvas. The faceted side faces up.
Tip: Add only enough drills to cover the bottom of the tray in a loose layer. Too many drills will not turn flat side down easily. Too few will not line up well in the grooves. It is better to refill the tray more often than to spill a full packet across the table.
Step 6: Load the Pen With Wax
Peel the clear film from the wax if it has one. Press the tip of the diamond painting pen firmly into the wax.
You do not need to reload the pen for every drill. A properly loaded pen should pick up several drills before the wax stops working.
If the drills keep falling off the pen, reload the tip. If old wax builds up around the pen, remove it and start fresh.
Step 7: Pick Up One Diamond
To pick up a diamond, touch the pen tip to the faceted side of the drill. The wax holds the drill long enough for you to move it to the canvas.
Do not press too hard into the tray. A light, controlled touch is enough when the pen has enough wax.
If a drill is upside down, shake the tray again instead of flipping each piece by hand.

Step 8: Place the Drill on the Matching Symbol
Find the matching symbol on the canvas and place the drill directly over it. Press gently so the flat side sticks to the adhesive.
Try to place the drill straight the first time. You can move it if needed, but repeated repositioning can weaken the adhesive or disturb nearby drills.
Go slowly at the beginning. Speed comes naturally after a few sections.
Step 9: Continue Across the Section
Keep placing drills until the small uncovered section is complete. You can finish one color first, then move to the next color in the same section.
This is usually easier than jumping around the entire canvas by color. It keeps the adhesive clean and makes mistakes easier to spot.
When the section is done, cover it again with the protective film, pull back another small part, and continue.
Step 10: Press Each Finished Section
After you complete a section, cover it again with the protective film and press gently with your hand. This helps the drills settle into the adhesive before you move to the next area.
Save heavier pressure with a roller, book, or rolling pin for the end of the project.
Single-Placer vs Multi-Placer Tools
Start with the single-placer tip. It gives you better control and helps you learn how much pressure to use.
A multi-placer can speed up large areas of the same color, but it can also create crooked rows if the drills are not lined up correctly. Use it when you have a block of 4 or more drills in the same color.
For small details, mixed symbols, faces, animals, or text, the single-placer is often faster because you spend less time correcting placement.
What Is the Best Way to Start a Diamond Painting?
The best way to start a diamond painting is to prepare a flat workspace, check the color key, organize the drill packets, peel back one small section of the film, and begin from a corner or edge.
Starting from a corner helps you avoid resting your hand on finished sections. It also gives you a clear direction, so the project feels less overwhelming.
Starting in the middle can work, but it is usually less convenient unless the design has one main focal point you want to complete first.
Should You Work by Color or by Section?
Beginners should usually work by section. It keeps the adhesive clean, makes mistakes easier to catch, and helps you avoid jumping around the whole canvas.
Working by color can be faster on simple designs, but it is easier after you already understand the process.
Make the Setup Comfortable
Diamond painting can take several hours, so your setup matters. If you work flat on a table for too long, your neck, shoulders, or back may start to hurt.
Keep the canvas close enough so you are not reaching across the table. Use strong light and take short breaks.
For larger canvases, a slightly angled surface can help. A tabletop easel or drafting board works as long as the canvas stays stable.
Good posture will not change the finished artwork, but it can make the difference between finishing the kit and leaving it half done.
Common Beginner Problems and How to Fix Them
Drills Are Not Sticking
This usually happens when dust, hair, lint, or oil gets onto the adhesive. Keep the protective film on the canvas and only uncover the area you are working on.
If a small spot loses stickiness, clean it gently and use a tiny amount of craft glue if needed. Do not spread glue across a large area unless the adhesive is badly damaged.
Lines Look Crooked
Crooked rows usually happen when drills are placed too quickly or pushed from the side.
Fix crooked lines early. Once several rows are placed around them, they become harder to move. A ruler or straightening tool can help push drills back into line.
Wax Stops Picking Up Drills
Wax gets dirty as you work. If the pen stops picking up drills, remove the old wax and reload the tip.
Do not keep pressing harder with bad wax. It slows you down and can make placement less accurate.
Drills Jump Out of the Tray
This often happens because of static. It is more common in dry rooms.
Lightly rub the outside of the drill bag with a dryer sheet before pouring the drills into the tray. You can also let the drills sit for a minute after opening the packet.
You Placed the Wrong Color
Use tweezers or the edge of the pen to lift the wrong drill. Replace it right away.
Do not leave mistakes for later. Once the surrounding drills are in place, removing one piece can disturb the row.
Missing or Wrong Drill Colors
Missing drills or wrong colors can happen, especially with larger kits. Before you start, compare the drill packets with the color chart and keep the packets until the project is finished.
If a color is missing, contact the seller and include the canvas code, color number, and a photo of the chart. Good support matters here because one missing color can stop the whole project.

How to Use a Diamond Painting Straightening Tool
A diamond painting straightening tool helps push drills into cleaner rows. Use it after finishing a small section, before the drills fully settle into the adhesive.
Place the edge of the tool against a row and gently nudge the drills into line. Do not scrape hard across the canvas. Small adjustments work better than forcing a whole area at once.
For square drills, a straightening tool can make a visible difference because gaps and uneven rows are easier to see. For round drills, it still helps, but the result is usually more forgiving.
Round vs Square Drills: What Should Beginners Use?
Round drills are easier for beginners because they are faster and more forgiving. You can still get a clean result even if the rows are not perfectly straight.
Square drills can create a sharper image, but they require more patience. If one square drill is slightly crooked, it can push the next row out of line.
For your first diamond painting, round drills are usually the safer choice. Once you understand the process, square drills are easier to handle.
How to Choose Your First Diamond Painting Kit
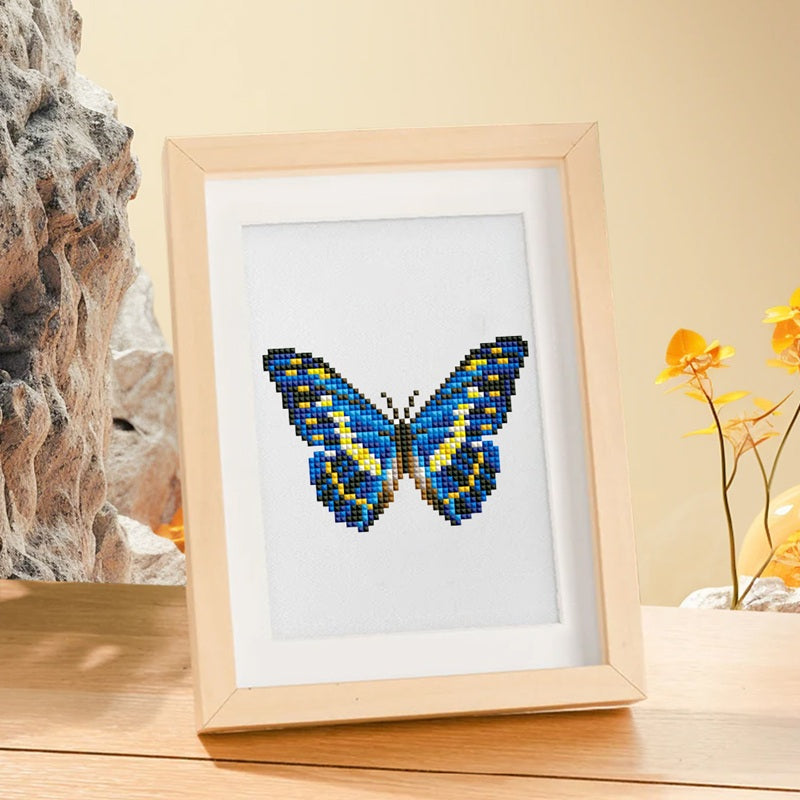
If you are choosing your first project, start with diamond art kits that have clear symbols, a strong adhesive surface, and a design you actually want to finish.
Your first kit should be simple enough to finish, but not so small that the image loses detail.
A very tiny canvas may look easy, but small designs often have less detail and can look blurry when finished. A medium size, such as 30x40 cm, is usually a better starting point for most beginners.
For a smaller project, mini diamond painting kits can be a good option because they are quicker to complete and easier to manage. They work best when the design has bold shapes and clear color areas.
Choose an image you actually want to finish. Diamond painting takes time. If you get tired of the design after one evening, the kit will probably stay unfinished.
For personal photos, a custom diamond painting can work well, but the image matters. Clear faces, good lighting, and simple backgrounds usually produce better results than dark or blurry photos. For custom kits, a preview is useful because it lets you check the crop and detail level before production.
What Actually Improves Your Results
Better results usually come from small habits, not expensive tools.
Keep your rows consistent. Fix crooked drills before moving to the next section. Work under good light. Keep the adhesive covered. Do not switch colors too often if it breaks your focus.
From customer questions, the most common beginner issues are simple: uncovered adhesive, mixed colors, unclear symbols, weak pen wax, and drills pressed at an angle. Solving those early usually improves the finished piece more than buying extra tools.
For square drills, try a checkerboard pattern in larger same-color areas. Place every other drill first, then fill the gaps. This can help keep rows straighter.
For dark designs, use a light pad if the symbols are hard to read. If you do not have one, a bright desk lamp is still better than working in weak light.
What to Do When You Finish
When the canvas is complete, place the protective film over the drills and press the full surface evenly with a roller, book, or rolling pin. Keep the film between the tool and the drills so nothing shifts or sticks.
Check the canvas from different angles. Look for loose drills, missing symbols, uneven rows, or areas that need another light press.
You do not always need to seal a diamond painting. If the adhesive is strong and the piece will be framed behind glass, sealing may not be necessary. If the canvas will be handled often or displayed without protection, our guide to sealing a diamond painting explains when it makes sense and how to do it safely.

FAQ
How is diamond painting done?
Diamond painting is done by matching each printed symbol on the canvas with the correct drill color. You pick up the drill with a wax-loaded pen and place it onto the sticky canvas section by section.
How do you pick up the diamonds in diamond painting?
Press the diamond painting pen into the wax, then touch the pen tip to the faceted side of a drill. The wax holds the drill while you move it to the canvas. Place the flat side of the drill onto the adhesive.
Is diamond painting the same as painting with diamonds?
Yes. Painting with diamonds is another way people describe diamond painting. Both terms mean placing small resin drills onto a sticky canvas by matching each drill color to the printed symbols.
What are common mistakes in diamond drawing?
Some beginners call it diamond drawing, but the craft is usually called diamond painting. Common mistakes include removing too much protective film, mixing drill colors, working in poor light, placing drills too fast, and waiting too long to fix crooked rows.
Is diamond painting hard for beginners?
Diamond painting is easy to start, but clean results take patience. The basic process is simple: match the symbol, pick up the drill, and place it on the canvas. The hardest part for beginners is keeping rows straight and staying organized.
Do you start a diamond painting from the top or bottom?
You can start from either, but most beginners should start from a corner or edge. Right-handed crafters often prefer starting on the left side and moving right. Left-handed crafters may prefer the opposite direction to avoid resting their hand on finished sections.
How long does a diamond painting take?
It depends on the size, drill shape, and amount of detail. A small kit may take a few hours, while a medium canvas can take several evenings or weeks. Large detailed kits can easily take 30–40+ hours, especially if they use square drills or many color changes.
Final Thoughts
Diamond painting is simple once you understand the order: prepare the canvas, match the symbols, load the pen, pick up the drills, and work in small sections.
Do not rush the first kit. Keep the adhesive covered, fix mistakes early, and press finished sections as you go. After a few sessions, the process becomes faster and more natural, and your finished diamond art will look much cleaner.