Discover the Joy of How to Diamond Painting: Your Step-by-Step Guide
If you're new to Diamond Painting, you've come to the right place! We'll walk you through each step, making it super easy to get started. Trust us, anyone can do it!
Diamond Painting for Beginners - A Step-by-Step Tutorial
Step 1: Unveiling Your Kit
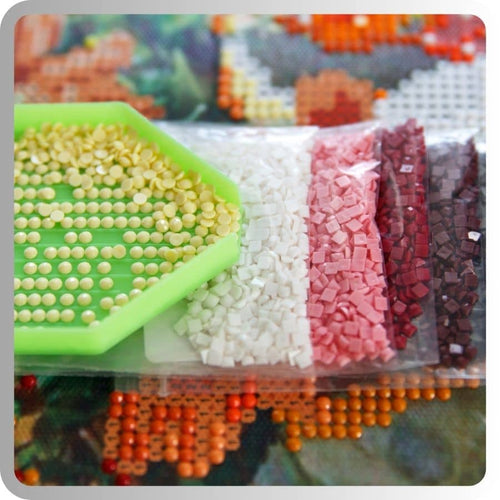
Open your diamond painting kit and prepare to be amazed. Inside, you'll find a sticky canvas, a diamond applicator (pen), a tray, and wax. Take everything out of the package and get ready for the fun to begin.
Step 2: Getting Set Up
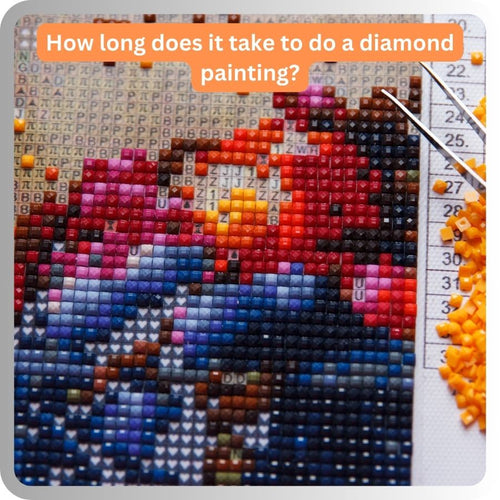
Find a clean, flat surface to work on. Spread out the canvas and notice the chart printed directly on it. The chart has numbered diamonds with matching symbols. Your job is to match the colors of the diamond drills to the symbols and place them on the canvas accordingly.
Step 3: Let's Get Started
Choose a single-color diamond to start with. Pour a small number of diamonds of a certain color into the tray. Tilt and gently shake the tray so the diamonds settle with the right side facing up. This way, you can easily pick them up with the applicator.
Step 4: Begin the Magic
Peel back a small section of the plastic film, or plastic cover from the canvas. It's best to work on a small area at a time. Remember to cover the canvas when you're not working on it to keep it safe and clean.
Step 5: The Sticky Secret
There's a pink square in the kit called wax. Peel off the clear adhesive plastic on the wax and dip the tip of the applicator into it. This adds a little wax to the applicator, making the faceted drills stick to it easily. Now you're ready to pick up the diamonds and place them on the canvas.
Step 6: Place the Drills
Carefully press each diamond onto its corresponding symbol on the canvas board. Keep going until you're done! If the applicator stops picking up the diamonds, add a little more wax and you're good to go.

Step 7: The Final Touch
Once you've placed all the diamonds, step back and admire your work. To give your diamond painting a polished look, consider framing it and hanging it up in your home. It's a great way to showcase your masterpiece and feel a sense of accomplishment. Be careful to select a frame that fits your canvas size.
Dive into this delightful craft and let your imagination soar. Remember, the most important thing is to enjoy the process and have fun. Grab your diamond applicator, pick one color and a canvas, and let the magic begin. Happy painting!
Do You Need a Diamond Painting Straightening Tool? How to Fix Gaps in Diamond Paintings
What Is a Diamond Painting Straightening Tool?
A diamond painting straightening tool is a special tool that helps you align the "diamonds" in your artwork. It looks a bit like a paint scraper. It's one of the most simple tools but on the other hand a necessary diamond painting tool for those who take diamond art seriously. There are a number of tools that will help you in your work, you can read our full guide on mastering diamond painting.

How Does It Work?
Using a diamond painting straightening tool is easy. Place the tool along the flat side of a row of diamonds, tilt it slightly, and press down firmly on the handle. This will straighten the diamonds into a neat line. It may take some time depending on your canvas size, but the results will be worth it.
Additional Tips for Keeping Your Drills Straight
While a straightening tool is helpful, there are other ways to keep your diamonds aligned:
-
Position Your Tray in Line with the Pattern: Align your drill tray parallel to the canvas pattern. This keeps your wrist in a natural position and helps you place the drills in a straight line.
-
Use a Multi-Placer Tool: Multi-placer tools allow you to place multiple diamonds at once, ensuring they are perfectly straight. Pick up several gems with the multi-placer and apply them to the canvas together.
-
Arrange the Drills in a Checkerboard Pattern: If you use a single-placer tool, arrange the drills in a checkerboard pattern. Place a diamond, skip a space, place the next, and repeat the pattern. Fill in the gaps later to create straight lines.
-
Straighten Your Rows with a Ruler: Use a ruler or straight-edged tool to align your diamond rows. Gently press the ruler against each row, straightening the diamonds. This achieves similar results to a straightening tool without an extra purchase. One of the top tips is to use a roll to gently press the diamonds into the canvas. You get the roll here.
-
Fix Crooked Drills with Tweezers: If some diamonds are crooked, use craft tweezers to twist them into position. Be gentle to avoid damaging adjacent diamonds.
Each of these techniques ensures your diamond painting looks flawless. So, grab your diamond painting kit, and your materials including the straightening tool if you have one, and let your creativity shine with this awesome new hobby!
Picking the perfect first diamond painting kit
Square or Round Drills?
Diamonds in diamond art can come in two shapes: round and square. Each shape offers a unique experience. Round diamonds are ideal for beginners due to their ease of placement. They don't require as much precision, making them more forgiving. On the other hand, square diamonds provide a more advanced and meticulous challenge. Many artists appreciate the satisfying clicking sound they make when properly placed. Start with round diamonds to get comfortable, and if you desire a more intricate experience, progress to square ones later on.
Choose Something You Love
The beauty of diamond art lies in the personal connection you have with your artwork. When selecting a painting, consider your interests, preferences, and what truly sparks joy within you. Whether it's a majestic landscape, a mesmerizing animal, or a captivating custom diamond art, choose a design that resonates with your heart. This emotional connection will inspire and motivate you throughout the painting process, ensuring a rewarding experience.

Take Your Time and Choose Wisely
When selecting the ideal diamond art kit, it's essential to savor the process and consider various factors. Take your time to explore different options, read reviews, and compare designs. This thoughtful approach ensures that you select a kit that aligns with your artistic vision and brings you immense joy throughout the creation process. Remember, diamond art is not just about the end result; it's about the fulfilling and delightful path you take to reach it.
Where to Buy Diamond Painting Kits
You've just found it! At Diamond Art World store, you'll find a wide selection of top-quality diamond art kits that are perfect for you. Each kit is designed to provide a relaxing and enjoyable experience as you create your own stunning artwork. With our full services, you can be confident that your shopping experience will be complete and satisfying. Our kits come with everything you need to bring your masterpiece to life, including vibrant and sparkling diamonds that will make your artwork shine. The canvases are carefully finished at the edges for durability and easy framing once your masterpiece is complete. Clear instructions are provided to guide you through the process, ensuring that you have a smooth and stress-free experience. Once your diamond painting is finished, you can proudly display it as a beautiful work of art in your home. At Diamond Art World, exceptional customer service is a top priority. Their knowledgeable team is always available to assist you with any questions or concerns you may have. With their user-friendly website, you can enjoy a seamless and secure online shopping experience. Join the growing community of diamond painting enthusiasts and unlock your creativity with Diamond Art World. Start your artistic journey today and create stunning diamond paintings that will captivate and inspire.


